So you have your Project imported into SmartPM. You’ve analyzed it. Better yet, you’ve created scenarios to gain better insights.
Now your OAC meeting is coming up, you have a new Schedule Update to get familiar with, and you’re going to need SmartPM to do it.
The follow these simple steps to successfully import and update your Project with the latest Schedule Update, in SmartPM.
-
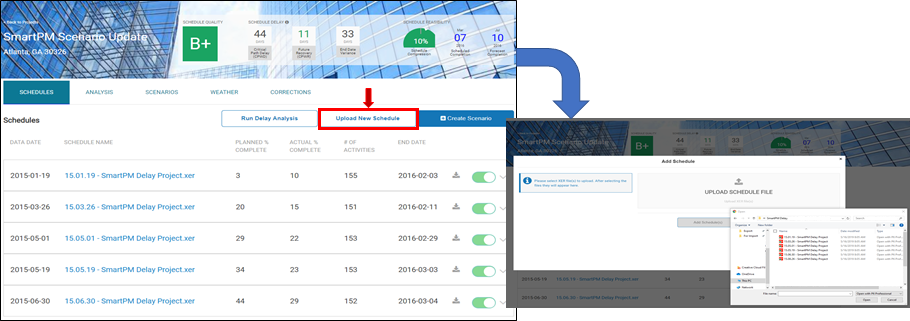
Navigate to the “Schedules” tab in your Project’s Project Dashboard and click “Upload New Schedule.”
-
Then locate and import your Schedule Update just like you normally would.

Your new Schedule Update is now loaded into SmartPM, but there are still a few more steps to take to get it ready for analysis.
-
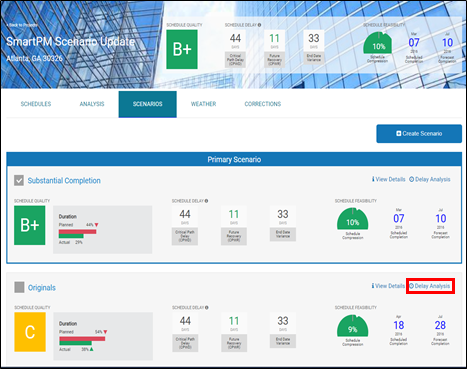
All new schedule imports are automatically applied to the “Originals” scenario. However, you will manually need to kick off the “Originals” delay analysis by heading over to the “Scenarios” tab and clicking “Run Delay Analysis” in the “Originals” scenario window

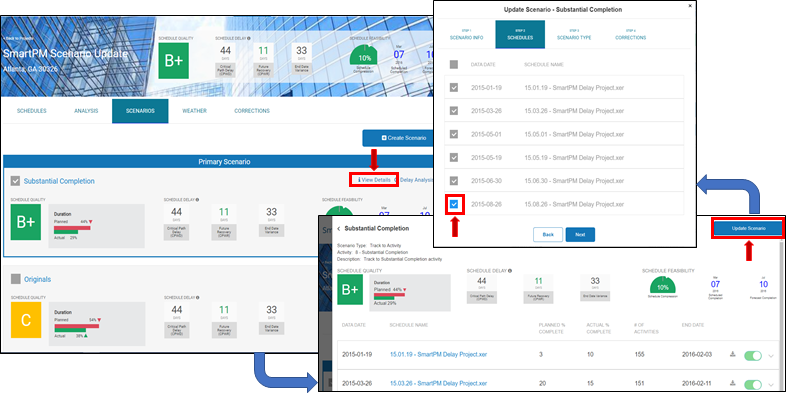
SmartPM does not automatically apply newly imported schedules to your already created Scenarios. You will need to take the following steps to update those applicable, existing Scenarios
- In the Scenario’s Window, click “View Details” and then click “Update Scenario”
- Follow the same steps you would in creating a Scenario – but when you get to Step 2: Schedules, select your new Schedule Update. Finish the rest of the steps, click finish, and a delay analysis will automatically kick-off for your updated scenario!

