Adding Users to a Project and Setting User Responsibilities / Preferences
Once you have created a Project, you will need to decide which Users from your Company's Roster will have access to the Project. You will also define the User Role each User will have in interacting with the Project.
There are two different project User Roles:
- Schedule Admin: The Schedule Administrator Role allows users access to all aspects of the SmartPM platform, including project set up, schedule management, and field entry/modification.
- Read-Only: A Read-Only User will have no ability to alter the state of the Project in any way, however, can utilize the program for project review and analysis purposes.

To begin adding Users to the Project, first, click the Settings tool on the right hand menu, and navigate to the Manage Users tab-
 Once the Manage Users tab is open, you will see that the User that created the Project will have been automatically populated as a Schedule Administrator
 You can add a new User by clicking the blue Add User button

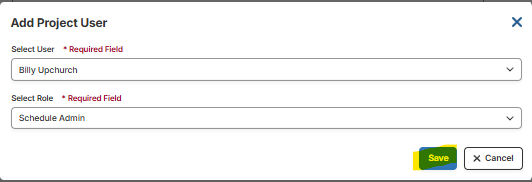
A drop down Menu will show up with everyone from your Company Roster available to add to the Project.

Select whoever you would like to add and then select their User Role

Once you have selected the User and Role, click Save, and that's it!
